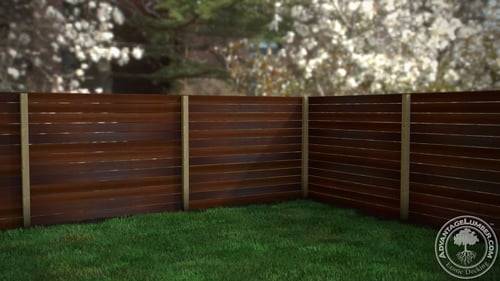
Ipe isn’t just for decking anymore. This versatile wood is perfect for a variety of outdoor projects because of its durability. Its strength and dimensional stability can make it a little harder to work with than other woods, but with a lifespan of 75 years, it’ll be worth it to put the little extra elbow grease into your project.
Today we’re going to show you how to build a fence out of Ipe. Not only will this give you added privacy, but it will look fantastic in your yard!

Step 1: pick out the straightest boards you can find from your shipment. This will make the fence building process easier.

Step 2: End seal your boards. This is going to keep the wood from cracking, splitting and warping over time.

Step 3: Measure where the board will overlap on the post. Mark the center of the overlapping part. This is where the board will be attached to the post. Make note of this measurement.

Step 4: Use a 1/8” drill bit and 3/8” countersink bit to predrill a hole for the screw.

Step 5: Apply some construction adhesive on the post. Allow the adhesive to dry before attaching the deck boards.

Step 6: Attach one end of the board to the post. Use a level and attach the board to the post.

Step 7: Next, take a biscuit joiner, set it to the correct depth for the clip that you’re using. Practice on some scraps first so you don’t risk ruining an entire board.

Step 8: Place the Ipe clip into the groove.

Step 9: Use the drill bit from the Ipe clip complete kit and predrill at a 45° angle. Attach the screws.

Step 10: Take your measurements from the first board and mark the next board.
Repeat steps 4-9 until your fence is complete.

Step 11: Insert wood glue into the hole and use a hammer to tap the plug to fit securely.

Step 12: Using a Flush Cut Saw, remove the extra piece of the plug so that it becomes flush with the board.

Step 13: Sand down the top of the plug with a 120 grit orbital sander for a smooth surface.

From here you have the option to oil the wood with Ipe Oil, or you can leave it untreated and allow it to weather to a natural gray.
***Pro Tip: Using an orbital sander leaves a smoother finish. Typical pad sanders will end up leaving scratches that become prominent as time