Stair building is an art form of its own. The perfect set of stairs makes a comfortable transition between areas. How often have you been on a deck where the stairs were too narrow, too long, or they just looked odd? Stairs need to be properly built for comfort, safety, and appearance. Remember, every deck is different, and building the correct set of stairs for your particular project enhances the appearance and creates safety for your guests.
Homeowners and builders often don’t consider stairs as an aesthetic component to their deck. Frequently you end up with a great looking deck with mismatched stairs. It’s like purchasing a Lamborghini and using hubcaps on the wheels. Go above and beyond to build stairs that enhance your deck.
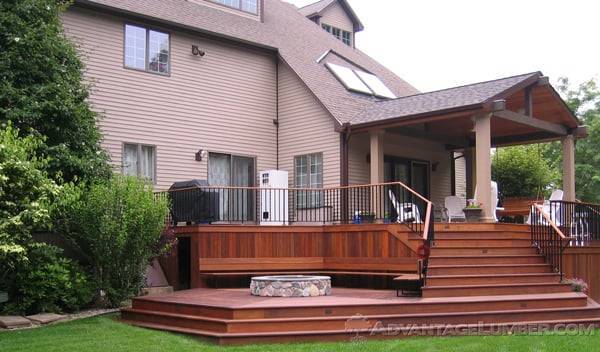
Wider stairs are inviting and open up a path for more than one person. For longer flight of stairs, consider adding landing breaks. This adds comfort for your guests when approaching your deck or home.
The main reason stairs are complicated for homeowners to build are the tread and riser measurements. You can use any ratio as long as the depth of the tread isn’t below 10 inches. The stringers themselves are a bit more technical, but it’s nothing a homeowner can’t figure out with some guidance.
To begin making the stringers, you’ll need to take accurate measurements.
1) Measure the vertical distance between the landing pad to the deck.
2) Once this measurement is calculated, divide it by 7 (this is a typical riser height) to get the number of stairs you’ll need. Now that you have your calculations, it’s time to begin marking and cutting stringers.
3) Using a square (an L shaped ruler), make sure your tread and height are marked. On one side of your square you have the measurement of your tread, and on the other the riser. With these two measurements you can begin marking your 2×12 wood accordingly.
4) Once the 2×12 is marked, grab a saw and cut along the lines. If you are using a circular saw, please make sure to not over-cut. This can lead to weak stringers that have the potential for collapse. It’s best if you finish the cutting with a hand saw or jigsaw.
5) Now that you have one stringer the next one is a piece of cake. All you do is lay the stringer you cut on top of a new 2×12 and trace. Voila! A new stringer has been marked. Use this process for creating as many stringers as needed.
Now that your stringers are done, attach them to your deck.
1) Attach the stringers, with hangers made for stairs, to the joist were your stairs will meet the deck. Attaching them with just nails doesn’t provide the fastening strength required for the loads that stairs carry.
2) Attach the treads to the stringers using screws. Nails can pop out with time and present a danger to people who use the deck.
Stairs are really an art form, but they are not so complicated that they can’t be built with a few pieces of lumber, a square and some arithmetic. Take a shot at them and be creative!