
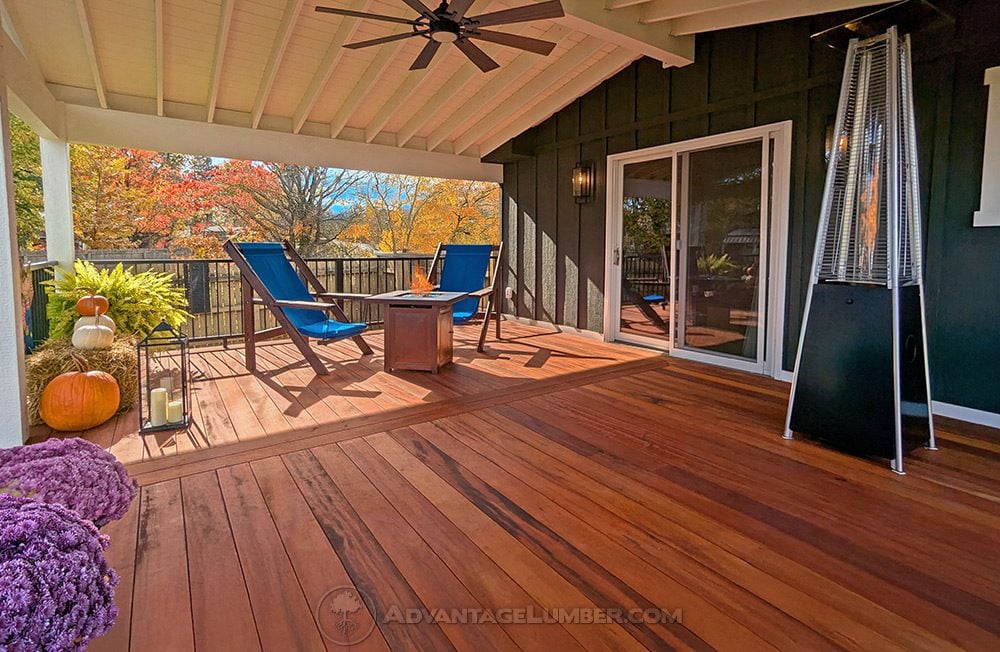
Wide deck boards can give your deck a beautiful, high end appearance. With fewer seams running across the surface, they create a bold look and really show off the natural grain of hardwoods like Ipe, Cumaru, and Tigerwood.
Personally, I’ve always liked the look of wider hardwood decking on large outdoor spaces. There’s just something about those broad boards that makes a deck look more substantial and expensive.
However, there’s something you should know before choosing wider decking. The wider the board, the more noticeable wood movement can become, especially when moisture isn’t properly controlled.
One of the most common problems you may encounter is cupping. Basically, this happens when the edges of a deck board rise or fall relative to the center, leaving a curved surface across the width.
If you’ve ever walked across an older wood deck and noticed the edges of certain boards curling upward, you’ve probably seen cupping firsthand. It’s not exactly the look most homeowners had in mind when they spent thousands of dollars on their new deck.
Although even premium hardwood decking can cup under the wrong conditions, installing it correctly goes a long way toward preventing problems.
So, let’s look at why boards cup and what you can do to keep them flat.
What Causes Deck Boards to Cup?
Wood naturally responds to its surroundings. Even after lumber dries and goes through the mill, it continues to absorb and release moisture as humidity and weather conditions change.
When wood absorbs moisture, it expands. On the other hand, when it dries, it shrinks.
Sounds simple enough, right? Well, the problem is that wood doesn’t always gain or lose moisture evenly.
The trouble starts when one side of a deck board holds more moisture than the other.
For example, imagine a deck where the underside of the boards stays damp because very little air moves beneath the structure. Meanwhile, direct sunlight heats the top surface and dries it much faster.
As a result, the top and bottom expand or shrink at different rates. Over time, this uneven movement can cause the board to bend across its width.
Depending on which side gains or loses moisture, the edges may curl upward or downward.
That’s what we call cupping.
Keep in mind, though, that cupping doesn’t necessarily mean you purchased defective lumber. In many cases, the wood simply reacts to uneven moisture or poor building practices.
In other words, even expensive hardwood decking can develop problems if the surrounding conditions aren’t right.
I’ve had people ask why a premium hardwood like Ipe would move at all. After all, isn’t Ipe supposed to be one of the toughest woods available? Absolutely, but being extremely dense and durable doesn’t mean the wood stops responding to moisture.
Why Wider Deck Boards Are More Prone to Cupping
One of the biggest differences between narrow and wide deck boards is how much they can move across their width.
To put this into perspective, let’s compare two common decking sizes:
- 1×4 decking: Approximately 3.5 inches wide.
- 1×6 decking: Approximately 5.5 inches wide.
Both boards expand and contract as their moisture content changes. However, the wider board contains more wood across its face, so it can move more overall. This is why we don’t recommend any wood deck board wider than 6″ wide (5.5 finished width).
Likewise, when moisture differences cause a board to curve, you’ll usually notice that curve more across a wider surface.
Think about it this way. If a board moves a small percentage across its width, that movement becomes more noticeable as the board gets wider. It’s the same basic principle whether you’re working with decking, hardwood flooring, or a solid wood tabletop.
Of course, this doesn’t mean you should avoid 6 inch decking. In fact, properly installed 1×6 Ipe, Cumaru, and other hardwood decking can perform very well for decades.
However, wider boards generally leave less room for mistakes when you plan airflow, control moisture, and choose fasteners.
With that in mind, if you’re building a deck close to the ground or in an area that stays damp, narrower boards may work better.
Personally, I’d rather recommend a slightly narrower board that performs well for decades than push someone toward wider decking simply because they like the appearance. There’s nothing wrong with wanting a beautiful deck, but it still needs to perform.
1. Poor Airflow Beneath the Deck
In my opinion, one of the most overlooked causes of hardwood decking problems is poor airflow beneath the deck.
Homeowners often spend a lot of time choosing the perfect deck boards, railing, and fasteners. However, they don’t always think about what’s happening underneath the deck.
Unfortunately, that’s a mistake.
And I get it. Nobody gets excited about showing their friends the airflow beneath their new deck. They want to show off the beautiful hardwood boards and railing. But what’s happening underneath can have a huge impact on how the deck performs.
When air can’t circulate beneath the decking, moisture can collect under the boards. Meanwhile, sunlight and wind continue drying the top surface.
Over time, the moisture difference between the top and bottom can cause the boards to cup.
For conventional hardwood decks, we generally recommend approximately 18 inches of clearance beneath the decking so air can circulate. However, the amount of space you’ll need depends on the decking product, site conditions, and manufacturer’s guidelines.
In fact, more clearance may help in damp areas where the ground dries slowly.
If you’re building a low deck, you’ll also want to consider how much sunlight reaches the ground and whether rainwater can drain away.
After all, a deck sitting just a few inches above damp soil can trap moisture for days.
I’ve seen plenty of low deck designs that look great on paper. Unfortunately, once you start thinking about drainage, ventilation, and how the boards will dry after a heavy rain, some of those designs don’t look quite as appealing.
How to Prevent It
First, design your deck so air can move freely beneath the boards. Also, keep the ground underneath well drained, and avoid enclosing the sides so tightly that moisture gets trapped.
If your project requires decking very close to the ground, consider another way to build it.
For example, hardwood deck tiles over a properly draining concrete patio or a suitable pedestal system may work better than conventional deck boards over framing with almost no airflow.
Ultimately, giving moisture a way to escape can make a big difference in how well your hardwood decking performs.
2. Installing Deck Boards Before They Adjust to the Jobsite
Another common mistake is installing wood without checking how much moisture it contains.
Keep in mind that hardwood decking can travel thousands of miles before it reaches your project. Along the way, it may experience different temperatures and humidity levels.
Even though the lumber has already gone through the drying process, it can still gain or lose moisture during shipping, storage, and installation.
As a result, if you install boards while their moisture content differs significantly from the conditions they’ll experience outdoors, they may move more afterward.
For example, boards that contain unusually high moisture levels may shrink as they dry. On the other hand, very dry boards may absorb moisture and expand.
Either way, the wood needs to adjust to its surroundings.
Here’s something worth remembering. Just because lumber looks dry doesn’t necessarily mean it has reached the right moisture content. You can’t always judge that by touching the surface or looking at the boards.
How to Prevent It
First, store your decking properly before you install it.
Keep the boards off the ground, protect them from rain and direct sunlight, and place spacers between layers when appropriate so air can circulate.
Also, follow your decking manufacturer’s advice on storage and acclimation. Although leaving lumber outside for several days may help it adjust, don’t assume that time alone will bring the wood to the right moisture level.
Instead, a moisture meter suitable for your wood species can help you decide when to install the boards.
With dense tropical hardwoods, make sure you use the correct species setting or correction factor.
Most importantly, avoid installing boards that are unusually wet on one side or have absorbed uneven amounts of moisture during storage.
I know it’s tempting to start installing decking the moment the lumber arrives, especially when you’ve been waiting weeks to get your project moving. However, taking a little time to check the material can save you from dealing with problems later.
3. Improper Fastening Can Allow Boards to Move
Fasteners play an important role in keeping deck boards secure.
Although no fastening system can completely stop wood from expanding and contracting, the right fasteners help control movement and hold the boards firmly against the framing.
Naturally, this becomes especially important with wider decking.
If you don’t secure the boards correctly, seasonal moisture changes may cause them to lift, twist, or cup more noticeably.
Fortunately, for hardwood decking, you generally have two common ways to fasten the boards.
Face Screwing
When you face screw deck boards, you typically drive two appropriate screws through each board at every joist. In most cases, you’ll want to place the screws near the edges while leaving enough distance to avoid splitting the wood.
This method provides strong mechanical restraint across the board’s width.
For especially wide decking or projects where moisture may become a problem, face screwing often makes more sense.
I realize face screws aren’t everyone’s favorite look. Some homeowners absolutely hate seeing screw heads across their beautiful hardwood decking. However, there are times when I’d rather have the extra holding power than worry about hiding every fastener.
After all, a deck that stays secure and performs properly is more important than a perfectly clean surface.
However, you should always predrill dense hardwoods like Ipe and Cumaru to help prevent splitting and broken screws.
Also, use corrosion resistant screws that can handle the wood species and outdoor conditions.
Hidden Deck Fasteners
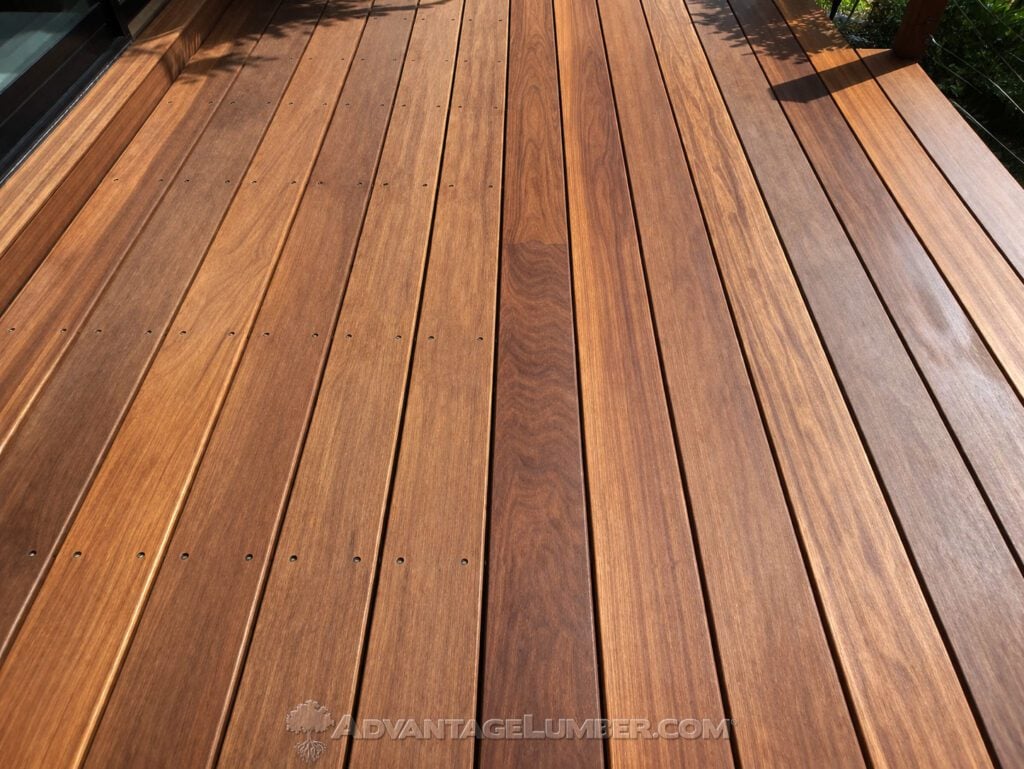
On the other hand, many homeowners prefer hidden fasteners because they create a clean surface without visible screw heads.
Systems like DeckWise Ipe Clip® work with grooved hardwood decking and provide a beautiful finished appearance.
And I’ll admit, a properly installed hardwood deck with hidden fasteners looks fantastic. When you don’t see rows of screws, your eyes naturally focus on the grain and color of the wood.
However, you need to follow the fastener manufacturer’s guidelines for board dimensions, joist spacing, and fastening patterns.
After all, not every hidden fastener works with every board width or building condition.
It’s also worth remembering that hidden fasteners won’t make up for poor airflow or excessive moisture.
So, if you’re installing unusually wide hardwood decking, check with your decking supplier before choosing a hidden fastening system.
4. Incorrect Board Spacing Can Create More Problems
Another important detail is the gap between deck boards.
Wood needs room to expand when it absorbs moisture. If you install boards too tightly, they may push against one another during humid or wet weather.
As a result, the boards can experience excessive stress, damaged edges, and even buckling. Although tight spacing doesn’t directly cause cupping, it can make moisture related problems worse.
On the other hand, if you leave excessively large gaps, the deck may look unattractive after the boards dry and shrink.
Ultimately, the right gap depends on the wood species, board dimensions, moisture content, and local weather.
I’ve seen people assume that tighter gaps always make a deck look better. Sure, small gaps can look nice when the boards first go down, but what happens when those boards absorb moisture and need room to expand?
That’s when problems can start.
How to Prevent It
First, follow the decking manufacturer’s spacing guidelines rather than using the same gap for every species and project.
For example, Ipe and Cumaru are both dense tropical hardwoods, but they don’t necessarily move the same amount as their moisture content changes.
Also, consider whether the boards are relatively dry or wet when you install them.
A dry board may expand during humid weather, while a wetter board may shrink as it dries.
In the end, getting the spacing right from the beginning can save you plenty of headaches later.
5. Joist Spacing and Framing Quality Matter
Your deck framing also affects how well the decking performs.
For example, if you space the joists too far apart, deck boards may flex too much between supports.
Although excessive joist spacing doesn’t directly cause moisture related cupping, poor support can contribute to twisting, movement, and uneven decking.
For many conventional hardwood decks, builders use 16 inch on center joist spacing. However, the right spacing depends on the decking thickness, species, board angle, and manufacturer’s requirements.
It’s also important to understand that wider boards don’t automatically need closer joists simply because they’re wider. Instead, consider the board’s full dimensions and the fastening method before you lay out the framing.
Additionally, make sure your joists are straight, level, and firmly attached.
Otherwise, if you install deck boards over uneven framing, they may look warped even when the wood itself is relatively flat.
I’ve always believed that a good deck starts with good framing. You can buy the most expensive hardwood decking available, but if the structure underneath isn’t built correctly, you’re asking for trouble.
One more thing worth mentioning: if you’re investing in premium hardwood decking or composite decking that may last 50 years or longer, think about how long the framing will last.
For that reason, steel or aluminum framing can make sense for homeowners who want a long lasting deck structure. However, even the best framing won’t prevent cupping if moisture collects beneath the decking.
6. Standing Water and Poor Drainage
Water is another major factor.
Although deck boards can handle rain, they shouldn’t stay damp for long periods because water can’t drain or air can’t reach them.
For example, a deck beneath heavy tree cover may stay wet much longer than one that receives several hours of direct sunlight.
Likewise, water collecting beneath a deck can keep the underside damp long after the top surface dries.
Over time, these conditions may cause uneven moisture movement.
And here’s something people sometimes forget. Just because the top of your deck looks dry doesn’t mean the underside has dried out. You might be walking across boards that still have plenty of moisture underneath.
How to Prevent It
First, make sure rainwater can drain away from the deck and the ground beneath it.
Also, keep leaves, dirt, and debris from collecting between deck boards. After all, these materials hold moisture and slow the drying process.
It’s also a good idea to check areas around planters, outdoor rugs, and furniture.
For example, I’ve seen homeowners leave large outdoor rugs in the same spot for years. As a result, the decking underneath stays damp much longer than the exposed boards, so the wood experiences very different moisture conditions.
I wouldn’t ever recommend an outdoor rug be placed on top of a wood deck and even most composite and PVC decking products advise against most outdoor rugs.
And while we’re on the subject, don’t forget about those large flowerpots sitting directly on the decking. They can trap moisture underneath, too. A few small changes like raising planters off the deck can help the wood dry more evenly.
7. Choosing the Right Deck Board Width
So, should you avoid wide deck boards altogether?
Absolutely not.
In fact, wide decking can look fantastic, especially on larger decks where fewer seams create a cleaner appearance.
However, the right board width depends on your project.
Personally, I don’t think there’s one perfect board width for every deck. I’ve seen beautiful decks built with both narrow and wide boards. What matters most is choosing the right material for the conditions.
When 4 Inch Decking May Be the Better Choice
Narrower decking may make more sense when:
- You’re building a deck closer to the ground (at your own risk if it’s under 18″ of ground clearance).
- The area experiences high humidity or frequent moisture exposure.
- Airflow beneath the deck is limited.
- You want to reduce how much movement you see across each board.
- You prefer the appearance of more closely spaced deck boards.
Additionally, a 1×4 hardwood deck can look very attractive, particularly on smaller decks, porches, and walkways.
In fact, some people prefer the more traditional appearance of narrower decking. There’s nothing wrong with that, and in certain conditions, it may offer practical advantages as well.
When 6 Inch Decking Makes Sense
On the other hand, wider 1×6 decking can work very well when:
- The deck has plenty of airflow beneath it.
- The framing provides proper support.
- You store and install the boards at an appropriate moisture content.
- The fasteners suit the board dimensions.
- The project has good drainage and normal drying conditions.
For most elevated decks with good airflow, I wouldn’t hesitate to consider 1×6 Ipe or Cumaru decking.
However, if someone asked me to install wide hardwood boards just a few inches above damp soil, I’d recommend changing the deck design before moving forward.
Would I rather sell someone wider boards because they like the look? Sure. But I’d much rather see them build a deck that performs well for decades.
After all, choosing the right board width from the beginning is much easier than dealing with cupping later.
Can You Fix Deck Boards That Have Already Cupped?
Sometimes. However, before you try to fix anything, you need to figure out why the boards cupped.
If temporary moisture differences caused the problem, the boards may flatten somewhat as their moisture content becomes more uniform.
For example, if the underside stays damp because air can’t circulate, improving airflow may help the boards dry more evenly.
Unfortunately, severely cupped boards may never return to their original shape.
In those cases, if the cupping is significant, you may need to replace individual boards.
I know replacing deck boards isn’t what anyone wants to hear, especially when the deck is only a few years old. However, sometimes replacing a few badly cupped boards makes more sense than spending hours trying to straighten wood that may never flatten completely.
Should You Sand Cupped Deck Boards Flat?
This is a question we hear from time to time.
Although sanding can sometimes smooth minor surface irregularities, I generally wouldn’t recommend sanding a badly cupped deck board before you fix the moisture problem.
Here’s why.
If you sand the board flat while one side still holds too much moisture, the board may change shape again as it dries.
As a result, you could remove quite a bit of wood only to watch the problem return.
And believe me, nobody wants to spend an entire weekend sanding hardwood decking only to see the same problem come back a few months later.
With hardwood decking, sanding also reduces the board’s thickness, especially along the high edges.
For minor surface corrections on stable hardwood decking, you can often use approximately 80 to 100 grit sandpaper. However, if a board has cupped severely, replacing it may make more sense.
Does Oiling Hardwood Decking Prevent Cupping?
Applying a quality hardwood deck oil can help maintain the natural color of Ipe, Cumaru, Tigerwood, and other tropical hardwoods.
Additionally, products like DeckWise Ipe Oil® can help repel surface water when you apply them correctly.
However, deck oil won’t replace proper building practices.
Even though penetrating deck oils can help reduce how quickly wood absorbs surface moisture, they can’t completely stop wood from absorbing and releasing moisture.
So, if your deck has poor airflow, standing water, or improper fasteners, applying oil won’t solve those problems.
I’ve heard people suggest applying more oil whenever hardwood decking starts to move. Unfortunately, it doesn’t work that way. You can’t fix poor drainage or inadequate airflow with another coat of oil.
Instead, think of deck oil as a way to help preserve the wood’s appearance, not a cure for cupping or other moisture related issues.
Final Thoughts: Proper Installation Makes All the Difference
Wide hardwood deck boards can create a beautiful outdoor living space, but they demand a little more attention when it comes to moisture.
Fortunately, in most cases, the best way to reduce cupping is to control the conditions that cause wood to gain or lose moisture unevenly.
That means giving the deck plenty of airflow, allowing water to drain, storing the lumber correctly, choosing the right fasteners, and following the manufacturer’s guidelines.
And remember, narrower decking may work better when airflow is limited or the deck will experience unusually damp conditions.
I’ve always felt that spending a little more time planning a deck is one of the smartest things you can do. After all, once you’ve installed hundreds of square feet of hardwood decking, fixing mistakes becomes a lot more expensive.
At AdvantageLumber.com, we stock a wide range of hardwood decking, including Ipe, Cumaru, Tigerwood, Garapa, Brazilian Redwood, Teak, and Mahogany.
If you’re planning a new deck and aren’t sure whether 4 inch or 6 inch decking makes more sense, our team can help you compare your options and choose the right boards and fastening methods for your project.
Ultimately, a little extra planning before you build can help you avoid expensive repairs and enjoy your hardwood deck for many years to come.
